October 25, 2010

13 Monster Cupcakes of Halloween: Witchy-Poo

This is Cakin' Crazy - the David Cakes link at the right. I love his style and he's lots of fun. Check out his fun, easy Halloween cakes!


My Halloween Monter No. 7 is Witchy-Poo. I didn't have a hat, but a cute witch anyway!


These are the tips I used: No. 3 round, No. 6 round and a grass tip.


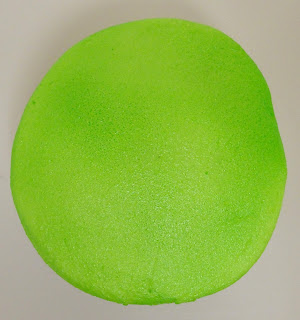
I started with a plain white iced cupcake that I airbrushed neon green. I also made a HUGE nose out of fondant. Take a piece of fondant and roll it down thin at one end to make the point. Stand it up and smooth it. Add a wart or two and point the nose the way you like.


This is the side view so you can see how large I made the nose.


Next, use the No. 6 round tip and white icing to pipe the rounds for the eyes. Then with black icing and a No. 3 tip pipe the rounds for the pupils of the eyes.


Next, with the No. 3 round tip and black pipe the eye lashes. Squeeze a little icing and pull it straight up.


With the same tip and black icing, pipe the mouth.


Next, I took the No. 3 round tip and white icing and piped straight lines for the teeth, just squeeze them a little thicker than normal. Then I used the No. 3 round tip and black icing and outlined the teeth.


Lastly, I used the grass tip and black icing and piped on the hair. I started at the top and went down. There are about 3 layers of icing to get the hair to fill in nicely.


I hope you enejoyed Monster No. 7. If you can find or make a hat that would add to the cuteness!  Tune in tomorrow for happy cupcake decorating and Monster No. 8!

October 24, 2010

SLASH ROCKS!

Who doesn't love Slash? You have to embrace all that is strange and wierd in the world! This cupcake, Monster No. 6 is my tribute to Slash. Try making some today!


These are the tips I used: No. 3 round and a normal No. 23 star tip.


I started out with a plain white iced cupcake. Using the No. 3 round tip and black icing that I added gel to so it would flow nicer, pipe the eyes - just wiggle the tip around to get a shape you like. I think a line between the eyes so it looked like glasses would of been nice too! Then pipe the mouth.


Next is the star tip and orange icing. You could change colors here too. I started at the top and came down. Pipe the hair to cover the top part of the cupcake.


Finally, I added the hat. This is a plastic hat, but you could certainly make this out of fondant or gumpaste and let it dry.


Enjoy making Slash! He would look great on a platter with the previous 5 Monster cupcakes. Happy Decorating!!!

October 23, 2010

She's Alive! Alive!

Check out this cool Bride of Frankenstein cake I found on You Tube! A classic, "I should of thought of that!" moment...


Now for my masterpiece...


These are the tips I used: No. 3 round, No. 4 round and a small star tip.


Start off  with a plain neon green iced cupcake-use the trusty paint roller for smoothness!


Then use the No. 4 round tip and white icing to pipe the rounds for the eyes.


Next is the No. 3 round tip and black icing. Pipe the rounds for the pupils and the squiggly line for the mouth.


Then the small star tip and more black icing. Pipe the wavey lines for her hair, but be sure to leave space for the white.


Next is another small star tip and white icing. Fill in between the black. Start at the bottom and go up so you have plenty of spike in her hair.


Next is a No. 3 tip and red icing. Pipe the heart for her lips-squeeze, pull, and let go...


Next is a No. 4 round tip and neon green icing. Pipe the round for her nose.


As I did for Frank, I used fondant to make the bolts for her neck also and airbrushed them with metallic silver airbrush. You could use luster dust for the same effect. Have fun making the happy couple!

October 22, 2010

Good Monsters Never Die!

What would Halloween be without Frankenstein?!? Monster No. 4 in my series of 13. Have fun making some of these decorated cupcakes for your friends and family!


These are the tips that I used: No. 2, No. 4 and a small star tip.


Start off with your plain iced cupcake. Yes, I smoothed it with my trusty paint roller! I airbrushed it neon green, but you can make neon green icing also.


Next, I used a No. 4 round tip to pipe the white rounds of the eyes.


Then, I used the No. 2 with black icing to pipe the rounds of the pupils, his mouth and the scar next to his eye.


Next, I used a No. 4 round tip to pipe the neon green round for his nose.


Then came the small star tip for the spikey hair. I started at the bottom and went to the top. Keep going until his hairline is to your liking.


The bolts in his neck (refer to top photo) I made from fondant. Roll 2 small rounds and 2 small stick shapes. Use water to fasten the two pieces together. Let them dry for awhile. I airbrushed them with metallic silver airbrush. You could use gumpaste or marzipan or maybe even 'real' small bolts -- just make sure no one eats them!!! Tune in tomorrow for the Mrs.!

October 20, 2010

Mumm's The Word!

Here we are 11 days before Halloween. Customers are starting to pour into the store ordering their monster cupcakes for next week. I have a feeling things are going to get crazy - but that's what I get for building such a cute display!

What would Halloween be without the classic mummy? Monster No. 3 is my MUMMY! Adorable, cute and easy to make!


These are the tips I used: No. 3 and a basketweave tip.


Start off with a plain white iced cupcake. I spread some black icing in the middle just so there was some color behind the eyes.


I made the eyes from fondant, just some rounds that I sprayed golden yellow. You could also use plain icing for this. I think they look nicer when  you make them different sizes.


Next I used the basketweave tip. Just start making strips going around the eye section so the area around the eyes is taken care of first. You could also use the other side of the basketweave tip that has the lines running thru it.


Continue to go around and around until you get the look you like. I put 3 layers of icing strips around the eyes to get this look.


Next is tip No. 3 - put two rounds of black for pupils on the yellow eyes. You could also use neon green, orange or purple for the eyes instead of yellow.


Whoa-la! There you have it. One cute, adorable mummy! Hope your having fun giving these a whirl!

October 19, 2010

Decorating Monster No. 2

What's not to LOVE about Halloween? Dressing up, all the ghouly stuff and of course, CANDY! Not to mention Martha Stewart's Halloween Special!

Cupcake Monster No. 2 is "X-man". He's very simple and easy to decorate. Try different colors too!


These are the tips I used:  No. 3 and No. 7 - that's it!


Start off with plain white icing on the cupcake - make it as smooth as possible on the top.


How did I do that? Glad you asked! These are my two favorite tools: a small off-set spatula, and


a small, high-density foam roller from the hardware store. Yes, the same small roller you use to paint your wall! Let your icing set and roll it smooth - it works like a charm! Be sure to use a VERY gentle touch.


Next, use your yellow icing and tip no. 7 and squeeze a round for his eye.


Then another No. 7 tip and a black round for the other eye. Next is a No. 3 with black icing for the pupil on the yellow eye and his mouth.


Nothing to it! Cupcake decorating is great fun - try some today! Hope you enjoyed Monster No. 2!!!

October 18, 2010

It's The Most WONDERFUL Time Of The Year...

Some days it's hard to believe I actually get paid to do something I love! I decorate cakes for my day job. Lots of people come into the store and want me to teach them to do what I do. "You make it look so easy!" they say.

Like everything else in life, when you master it, it IS easy! So I decided to start this blog for decorating cupcakes because I have lots of ideas swimming around my head!

This is my premiere series of  "The 13 Monsters of Halloween" featuring my cutest cupcake designs. I"ll try to stick to icing and fondant, but I"ll sneak other things in too. So please enjoy my monsters!

Monster number one is my pumpkin. He can be made scary or cute with a smiley face.


 These are the tips I used: A leaf tip, a #10, #6, #3 and #2.


Cut the end off your icing bag and insert a coupler. For the orange pumpkin part, I just squeezed the icing thru the coupler, no tips. Your first squeeze should include some pressure, and ease up as you get to the bottom of the cupcake.


Do the same thing for rib number 2.


Again, for rib number 3.


And one last time for rib number 4. If your icing gets 'pointy' at the bottom just use the edge of your coupler to adjust it.


Next, use a #3 tip and brown icing to make the stem for your pumpkin.


The leaf tip is up next with green icing. You can place a leaf on each side of the stem if you prefer.


Next is tip #10 and the white icing. Squeeze two rounds for your eyes-make them different sizes for variety. Then squeeze the mouth, straight or smiley.


Back to tip #3 and black icing. Place two lines for the eyebrows, two rounds for the pupils and the mouth can be one straight line, or the stitches - it's your preference!


For some added fun, I used a little red gel for the blood and tip #2 - which is totally optional!


Kids will absolutely love making these also. Be the rock star of your Halloween party and whip some of these up! Come back tomorrow for Monster No. 2.